

Once you have configured a sensor, navigate to the sensor page by clicking on it, then click on “Import data.”
Select your data file, specify the time zone used, and upload the data.

For the smoothest upload process, it is recommended to use a standard CSV file format.
The file should contain at least two columns:
- Timestamp
First column, optionally named “timestamp”, containing date and time in a common format, such as:2024-12-31 08:00:00 - Irradiance
Second column named according to your sensor (e.g. “MS-80_1”), containing irradiance data in W/m², for example:580.01
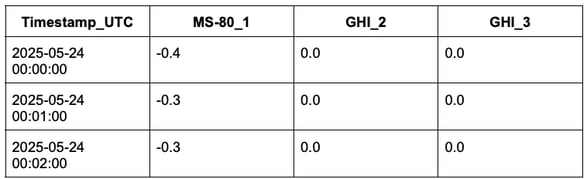
Example of a supported format
timestamp_UTC;MS-80_1;GHI_2;GHI_3
2025-05-24 00:00:00;-0.4;0.0;0.0
2025-05-24 00:01:00;-0.3;0.0;0.0
2025-05-24 00:02:00;-0.3;0.0;0.0
...
If your file contains multiple columns, make sure that the column you want to import has the same name as the sensor it represents.
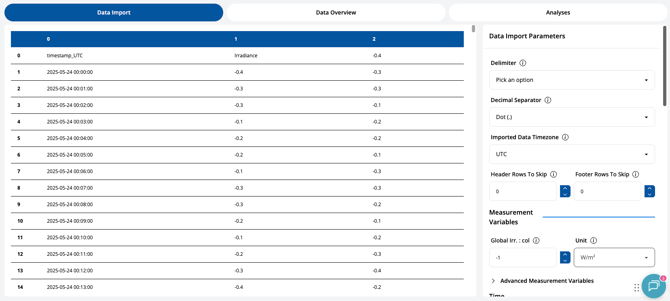
If your file has less straightforward formatting, the interactive Data Onboarding Tool will pop up to help. Provide details of your file structure to import your data correctly.
For more information about supported file formats, please refer to the article: Prepare a supported data file for import.
If you need support for a custom data file, please refer to the article: Import a custom data file
After importing your data, the next step is to verify your data file by running a sensor data configuration check: Run a sensor data configuration check.